Table of Contents
Struggling with a sourdough starter not rising? Discover expert tips and solutions to revive your starter and ensure its bubbly and active for perfect sourdough bread.
Sourdough bread, with its tangy flavor, chewy texture, and crispy crust, has captivated the hearts of bread lovers worldwide. The key to baking this artisan bread lies in a healthy, active sourdough starter. However, many bakers, both novice and experienced, often encounter a common issue: a sourdough starter not rising. This article delves into the reasons behind this problem and provides practical solutions to get your sourdough starter back on track.

Why Your Sourdough Starter Not Rising
The vitality of your sourdough starter is influenced by several factors, including temperature, flour type, water quality, and feeding frequency. A starter that isn’t rising as expected can be a sign of imbalance or distress within this mini ecosystem.
Temperature and Its Impact
Temperature plays a crucial role in the activity level of the yeast and bacteria within your starter. A too-cold environment can slow down fermentation, while too warm conditions can deplete the starter’s food supply too quickly. Ideally, sourdough starters thrive at temperatures between 68°F and 75°F (20°C to 24°C).
Flour Type and Its Role
The type of flour you use can significantly affect your starter’s health. Whole grain flours, such as whole wheat or rye, are rich in nutrients and can help your starter rise more vigorously. In contrast, all-purpose flour, while still usable, might not provide as much fuel for the yeast and bacteria.
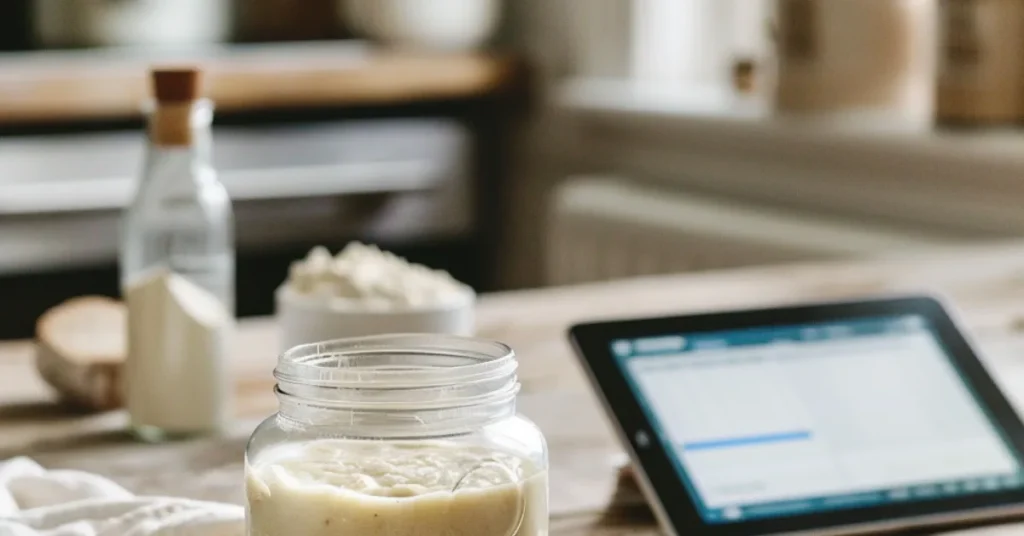
Water Quality Considerations
When nurturing a sourdough starter, the quality of water used can significantly impact its health and ability to rise. Many bakers overlook this aspect, focusing more on flour types and feeding schedules. However, the water you mix with your flour plays a pivotal role in the fermentation process, affecting the growth and activity of yeast and beneficial bacteria in your starter.
More recipes: Herbal Cordial Recipe
The Impact of Chlorine on Sourdough Starters
Tap water, while convenient, often contains chlorine or chloramine, added by municipal water systems to kill harmful bacteria and pathogens. While these additives make the water safe for drinking, they can inhibit the growth of the yeast and lactobacilli that are crucial for a healthy sourdough starter. Even small amounts of chlorine can adversely affect the microbial balance, leading to a starter that struggles to rise and lacks the desired activity level.
Solutions for Chlorinated Water
- Letting Water Stand: One simple method to reduce chlorine levels is to let your water stand uncovered for 24 hours. This allows chlorine to evaporate naturally, although this method is less effective for chloramine, which is more stable and does not evaporate as easily.
- Boiling: Boiling water for 15 minutes can help to remove chlorine, but like letting it stand, it’s less effective for chloramine.
- Filtered Water: Using a high-quality water filter that specifically removes chlorine and chloramine can be an excellent solution. Filters that use activated carbon or reverse osmosis are particularly effective.
- Bottled Water: In areas where tap water is heavily treated, switching to bottled water can be a straightforward solution. However, it’s essential to choose brands that do not contain added minerals or treatments that could also affect your starter.
The Role of Minerals in Water
The mineral content of water, often referred to as water hardness, can also influence sourdough starter development. Minerals like calcium and magnesium are beneficial in moderate amounts as they can help strengthen the gluten network in dough. However, excessively hard water might lead to a tighter gluten structure, making it difficult for the starter to rise effectively.
Conversely, very soft water lacks these beneficial minerals, which can result in a weaker gluten structure and a less active starter. If you suspect water hardness is an issue, using bottled spring water, which typically has a balanced mineral content, can provide a good middle ground.
Testing and Adjusting Your Water
For those who are serious about sourdough baking and want to optimize every variable, testing your tap water can provide valuable insights. Water testing kits are available online and can help you understand your water’s chlorine, chloramine, and mineral levels. Based on these results, you can make more informed decisions about treating your water or switching to an alternative source.

Diagnosing the Problem why Sourdough Starter Not Rising
When faced with a sourdough starter that’s not rising, it’s crucial to diagnose the problem accurately to apply the correct solution. A healthy sourdough starter is the backbone of delicious sourdough bread, characterized by its ability to rise and impart a tangy flavor. If your starter is sluggish or inactive, several factors could be at play. Understanding these factors will help you troubleshoot effectively and get your sourdough starter back on track.
More recipes: Easy Lasagna Recipe
Signs of an Unhealthy Sourdough Starter
Before diving into potential issues, let’s identify the signs of an unhealthy sourdough starter:
- Lack of Bubbles: A healthy starter should have plenty of bubbles, indicating active fermentation.
- No Rise: After feeding, a starter should at least double in volume. A starter that remains flat indicates a problem.
- Unpleasant Odor: While a tangy smell is normal, an overly sour or unpleasant odor can indicate an imbalance in the bacteria and yeast.
- Visible Mold: Any signs of mold mean the starter has been contaminated and should not be used.
Common Mistakes to Avoid
Several common mistakes can lead to a sourdough starter not rising. Identifying and correcting these mistakes is often the first step in reviving your starter:
- Inconsistent Feeding Schedule: Regular feeding is crucial for maintaining a healthy starter. Inconsistency can lead to a decrease in the starter’s activity.
- Incorrect Flour-to-Water Ratio: The balance of flour and water affects the starter’s hydration level, which in turn influences its activity. Too much water can dilute the microbial activity, while too little can hinder it.
- Using Chlorinated Water: As mentioned earlier, chlorinated tap water can inhibit the growth of yeast and bacteria in your starter.
- Poor Temperature Control: Extreme temperatures, either too hot or too cold, can adversely affect your starter’s health.
- Using Low-Quality Flour: The nutrients in the flour feed the yeast and bacteria. Using old or low-quality flour can deprive your starter of the necessary nutrients.
Steps to Diagnose Your Sourdough Starter
- Review Your Feeding Routine: Ensure you’re feeding your starter regularly with the right ratio of flour to water.
- Check the Water: If you’re using tap water, try switching to filtered or bottled water to see if there’s an improvement.
- Evaluate the Flour: Consider the type and quality of flour you’re using. Switching to a whole grain or rye flour, which is richer in nutrients, might help.
- Assess the Environment: Make sure your starter is kept in an environment with a stable temperature, ideally between 68°F and 75°F (20°C to 24°C).
- Look for Contamination: Examine your starter for any signs of mold or unusual colors, which could indicate contamination.
Diagnosing the problem with a sourdough starter that’s not rising requires a bit of detective work. By paying close attention to the signs of an unhealthy starter and reviewing your sourdough maintenance practices, you can identify the issue and take steps to correct it. Remember, reviving a sourdough starter is often possible with patience and careful attention to feeding, hydration, and environmental factors. With the right care, your sourdough starter will be back to its bubbly, rising self, ready to leaven delicious sourdough bread once again.
Incorporating Sourdough Starter in Recipes
The versatility of a sourdough starter extends far beyond the realm of artisan bread. This natural leavening agent can be incorporated into a wide array of recipes, adding not only the distinctive sourdough tang but also improving texture and nutritional content. From breakfast favorites to sweet treats, the inclusion of sourdough starter can transform ordinary recipes into something extraordinary. Here’s how to creatively use your sourdough starter in various dishes, making the most of its unique properties.
Pancakes and Waffles
Starting your day with sourdough pancakes or waffles can add a delightful twist to your breakfast routine. The natural fermentation of the sourdough starter not only contributes a subtle tanginess but also makes these breakfast staples lighter and easier to digest. Simply substitute a portion of the flour and liquid in your regular pancake or waffle recipe with your active sourdough starter. The result? Fluffy, tender pancakes and waffles with a depth of flavor that’s unmatched by any store-bought mix.
Pizza Dough
Elevate your homemade pizza with a sourdough crust. The complexity of flavor and improved texture that sourdough brings to pizza dough is unparalleled. Replace part of the flour and water in your pizza dough recipe with sourdough starter for a crust that’s crispy on the outside and chewy on the inside, with those characteristic sourdough air pockets. Plus, the slow fermentation process enhances the dough’s digestibility and nutritional profile.
Crackers
Transform your discard starter into a batch of crispy, flavorful crackers. Mixing sourdough starter with flour, olive oil, and your choice of herbs and seasonings creates a simple dough that can be rolled thin and baked to perfection. This is not only a great way to reduce waste but also to produce a healthy, homemade snack that’s customizable to your taste preferences.
Cakes and Quick Breads
Yes, sourdough starter can even find its way into your desserts and sweet treats. Adding sourdough starter to cakes and quick breads imparts a tender crumb and moist texture. It can also cut through the sweetness with its tang, balancing flavors beautifully. Banana bread, chocolate cake, and muffins can all benefit from the addition of sourdough starter. Just remember to adjust the amounts of flour and liquid in your recipe to accommodate the starter.
Artisan and Specialty Breads
Beyond the classic sourdough loaf, your starter can be the basis for a variety of artisan and specialty breads. From rye to whole wheat, focaccia to ciabatta, the starter lends complexity and depth to the flavor profile of these breads. Experimenting with different hydration levels and flour types can lead to an exciting array of textures and tastes, all from the same foundational sourdough starter.
Tips for Success
- Balance the Ingredients: When incorporating sourdough starter into recipes, adjust the amounts of flour and liquid accordingly to maintain the recipe’s original consistency.
- Consider the Starter’s Activity Level: Use an active, bubbly starter for leavening purposes, such as in bread and pancakes. Discard starter is perfect for recipes where leavening isn’t crucial, like crackers and some cakes.
- Experiment with Flavors: The tanginess of the sourdough starter can complement a wide range of flavors. Don’t be afraid to experiment with different ingredients and seasonings to find the perfect match.
Frequently Asked Questions About Sourdough Starter Not Rising
How long should I wait after feeding to see if my sourdough starter is rising?
Wait about 4 to 12 hours, depending on the temperature of your environment. Warmer temperatures accelerate the fermentation process.
Can I still bake with a sourdough starter that’s not rising well?
It’s best to wait until your starter is reliably doubling in size after feedings. A starter that’s not rising well might not have enough yeast activity to leaven bread properly.
Is it better to discard a sourdough starter that’s not rising and start over?
Not necessarily. Many issues with sourdough starters can be fixed with adjustments to feeding, hydration, and environment. However, if there’s mold or an unpleasant odor, it’s safer to start anew.
How often should I feed my sourdough starter if it’s not rising?
When troubleshooting, you might need to feed it once or twice daily to boost its activity. Adjust based on how your starter responds to these changes.